


After doing a few batches of resin eyes, I’ve gotten nice enough results to document the process. It’s not a perfect product, but these type of eyes are a great way to test out designs and create a custom anime character.
A few basic safety rules: follow the instructions for these products very precisely, especially mix times, temperatures and ratios. Use a ventilator and gloves when handling the liquid resin components and aerosol sprays. Tie back long hair and loose clothes. Work in a well ventilated room, away from kids and pets.
First, making the mold:
I used an empty tofu tub, but any sort of cheap plastic container can work. The bottom is filled with modeling clay, which I’ve roughly leveled. Pressed into that are some decorative glass gems, corresponding in size to 22mm eyes. The lot is coated in mold release spray – follow the instructions carefully.
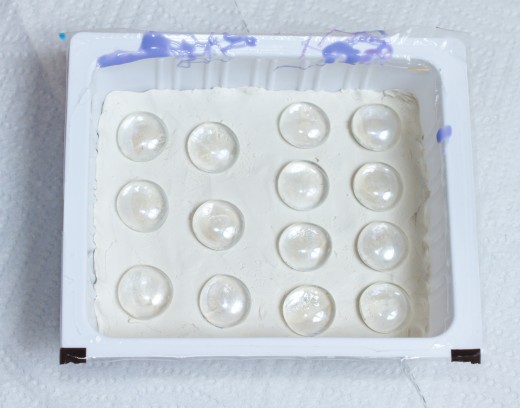
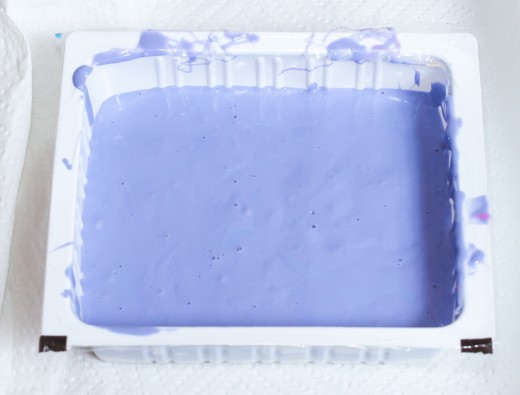
Next the silicone mold mix is combined and poured over the lot, in this case I used Smooth-on Oomoo 30. It’s pretty easy to use, just remember to use non-latex gloves with it.
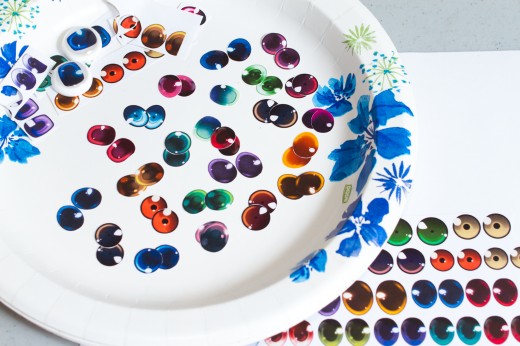
Meanwhile that’s setting up, I cut out my eye prints. They’re just printed off a color laser machine at the office supply store, nothing fancy. I’m always cutting extras just in case of mistakes ^_^;
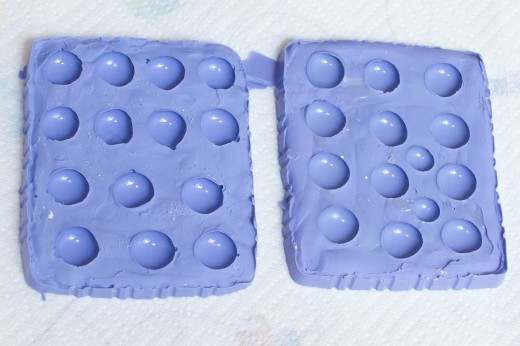
Ta-da! Molds are done and ready for resin.
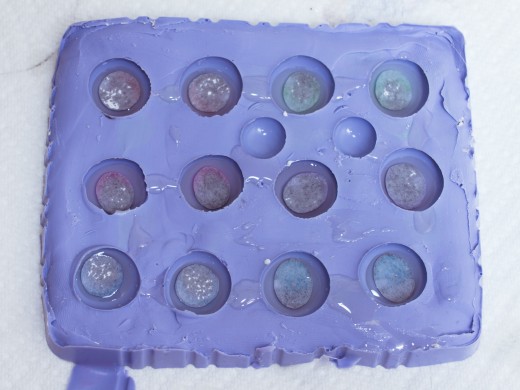
First, mix carefully and pour the ClearCast resin. This stuff needs to stay pretty warm to degass properly, so it should be warmed before mixing and during the first 10 minutes of setting. I like to go over it with a lighter to kill bubbles on the top. After about an hour, I add my eye cutouts on top and nudge them into place with a toothpick.
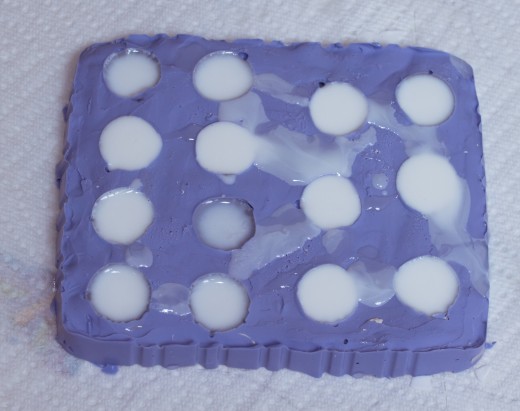
The next day, I mix up my Smooth-on Smooth Cast 300 white resin, and pour on top.
After another 48 hours, the ClearCast resin is fully set and the eyes are done! They look a little globular due to the uneven nature of the glass gems I molded from.

Ta da! Resin eyes :D